Overview:
Step 1: Reset the password
Step 2: Forward the macro to the user correctly
Step 3: Resolve Medirite Incident in portal
Step 4: Resolve Peach Helpdesk Ticket
Please note the screenshots in this article were taken from 2 different cases.
Step 1: Reset the password
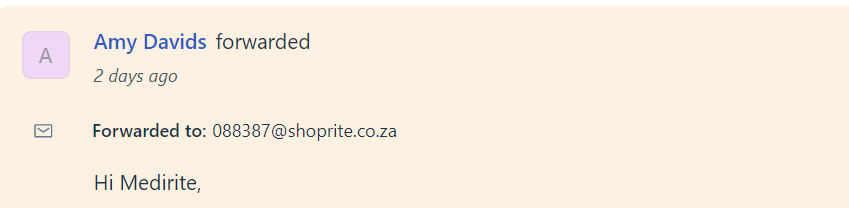
Once you receive a ticket for a MediRite password reset, it will be immediately identifiable by the attached incident report that links to the MediRite portal as seen below:

From here you do the following:
Search for Medirite in the BIP
The account will be under MediRite on the channel level.
Find the MediRite branch specified in the ticket
Under the account’s contacts, use the customer number specified in the ticket to identify which email address to reset - there’s usually only one email address with the number, but if there are more, cross reference with the ticket.
Reset the password

Step 2: Forward the macro to the user correctly
When sending the macro to the client, it is important to follow the correct steps, otherwise, they will not receive it.
Do not Reply to the email
Instead, Forward to the email address that is attached to the updated email, which you can identify with the “new” keyword somewhere in the contact
Alternatively (and more accurately) cross-reference the customer number, which can be found on the incident report), with the email address of the BIP contact
Use the macro titled “Medirite PAYSAFE New Password” - remember all MediRite accounts are Paysafe only so they do not use the BIP, but the Paysafe portal, so all the information they need specifically will be covered in the macro.

Step 3: Resolve Medirite Incident in portal
Before you can resolve Peach’s ticket in Freshdesk, it must be resolved in Medirite’s Incident portal.
You can click on “view this in Remedy with SmartIT” in the Incident Report to access the portal login.
Login details:

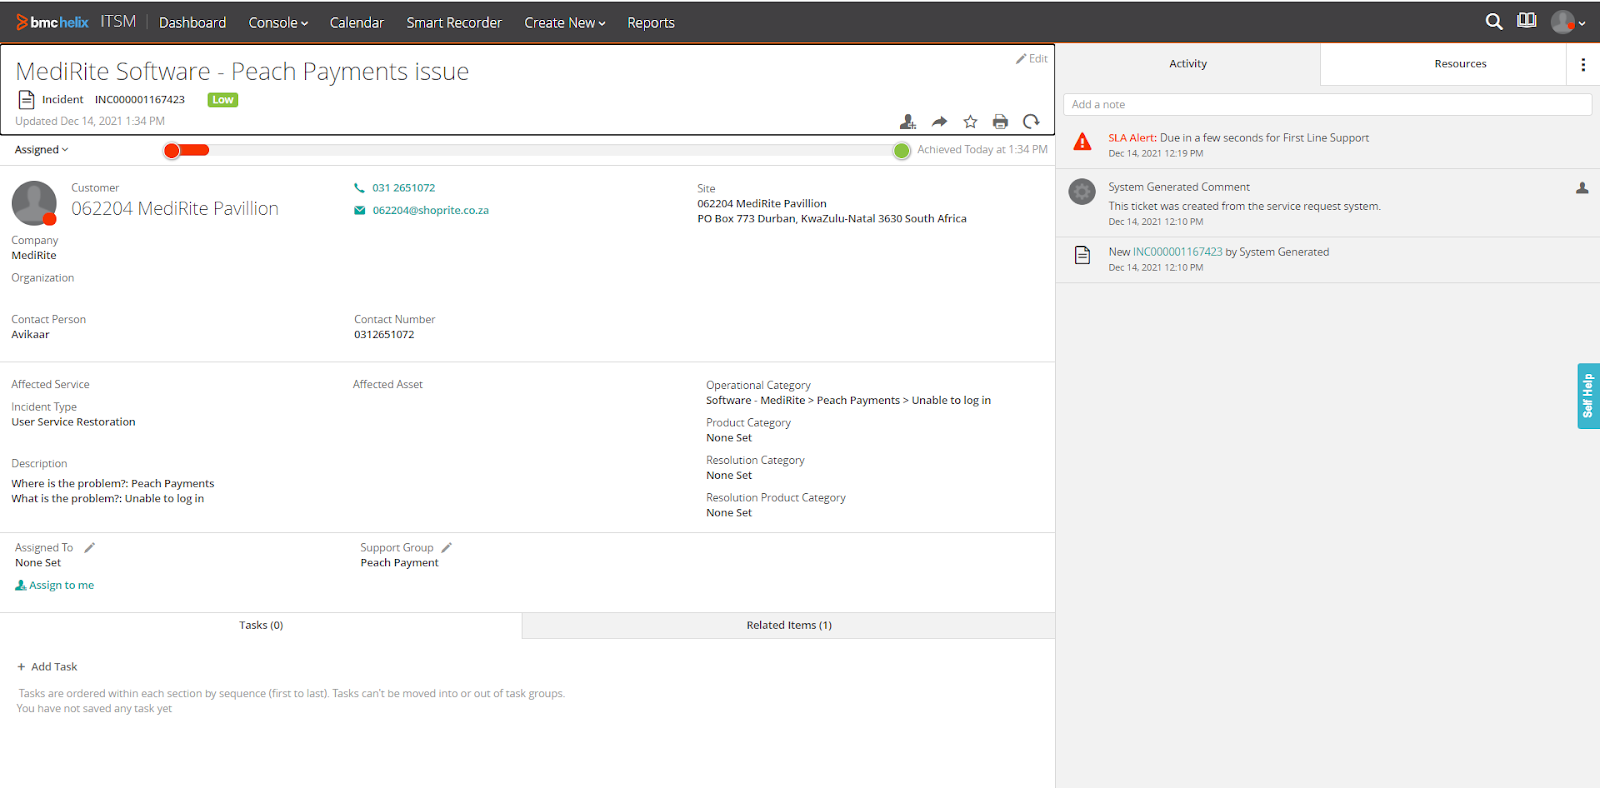
Once logged in, open the ticket details (top left corner arrow dropdown, reads “Assigned”)
This will allow you to view and edit the ticket details.

Make the following changes to the ticket:
Status: Resolved
Status Reason: No Further Action Required
Resolution Note: “Password Reset”
Save the changes by clicking the Save button on the top right of the page.
Please note sometimes the system may be receiving multiple requests at one time and will kick out an error message. If this happens, try to save again in a couple of minutes.
Once the details save successfully, the Activity tab will be updated to reflect the changes made.

Step 4: Resolve Peach Helpdesk Ticket
All done! From this point, you may go to your helpdesk ticket and set the status as Resolved.
Don’t forget to include the Support Type fields before resolving the ticket.
Take Note
Do not reply to emails from incoming@shoprite-mail.onbmc.com (this is an automated ticket opened by Medirite’s system and cannot receive emails - similar to noreply emails, it will automatically bounce and we will receive another ticket to inform of the failure)
If you need to reply to the medirite email for whatever reason, please add a note and include the Medirite email address from the bip so they will receive it - this is usually not necessary but good to know