Objective
The objective of this process is to close or suspend a Peach Payments merchant account. The account is disabled in all systems to ensure processing of live transactions are stopped.
How do we differentiate between an active and a disabled account?
The status of the account will be shown in the LIVE BIP or LIVE Console
1. BIP
In the bottom left corner of the transactions screen in the BIP you can click on the white arrow which will allow you to show disabled entities
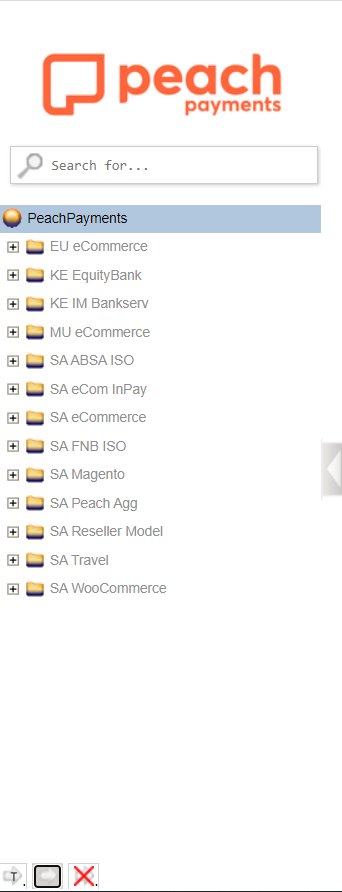 |  |
We can distinguish the disabled merchant account as the "greyed out" house icon and the enabled merchant accounts as the "highlighted" house icon
2. LIVE Console
The status of a merchants account in the Console is usually set by our Finance department after the account is disabled and billing is completed
 |
We are able to distinguish between a live and cancelled account in the Console State.
3. Why do merchants close their account with us ?
A merchant can decide to close their account with us for the below reasons
>Business Closure
>Change in their business model
>Joined Competitor
>Our solution is unaffordable (fees)
>Poor service/Slow service
>Other reasons- which the merchant stipulates in the submission form
>Risk Declined/Risk Team terminated account due to non compliance
When the merchants account is Risk Declined our Risk team also forwards a request to the Cancellations Pipe in order to ensure the account is deactivated in all live environments.
What is required to close or suspend a Peach Payments Merchant account?
Freshdesk ticket or request from the merchant
The merchant sends the request via Freshdesk.
We then locate the merchant application / Existing Pipefy card in Pipefy.
A comment or note is added in the card along with the ticket link where the merchant has requested closure o suspension of their Peach merchant account.
The note added here is critical for an overview of the request and easy access to the ticket where the merchant has requested closure or suspension of the account should anyone of Peach need to refer back to the ticket.
Once the note is added the card will be moved to the "Cancelled" phase , allowing a duplicate card to be created in the Cancellations Pipe for processing.
 |
Once the card is created in the Cancellations Pipe, the existing Pipefy Card is automatically linked to the Cancellation card for referencing.
 |
For Older merchants (merchants onboarded before Pipefy) who do not have an existing Pipefy Card to transport to the Cancellations pipe, a manual card is created in the Cancellations Pipe and a request for Sales to provide the Hubspot Deal ID and Segment should be carried out to input the incomplete data in "Capture Details" phase in Cancellations Pipe.
Once the card is in the Cancellations Pipe the process for Closure/ can begin.
Starting the process and different phases in the Cancellations Pipe
Phase 1 - Capture Details and Input Data
Once the merchant successfully submits the form a card is automatically created in the Cancellations Pipe in the "Capture Details " phase
 |
Once the card reaches this phase the form is neatened and the correct merchant data is input in the required fields.
The effective date for cancellation is also required here for transaction processing purposes. If the merchant has not indicated then it is best to reach out to them to confirm the date they would like to be disabled.
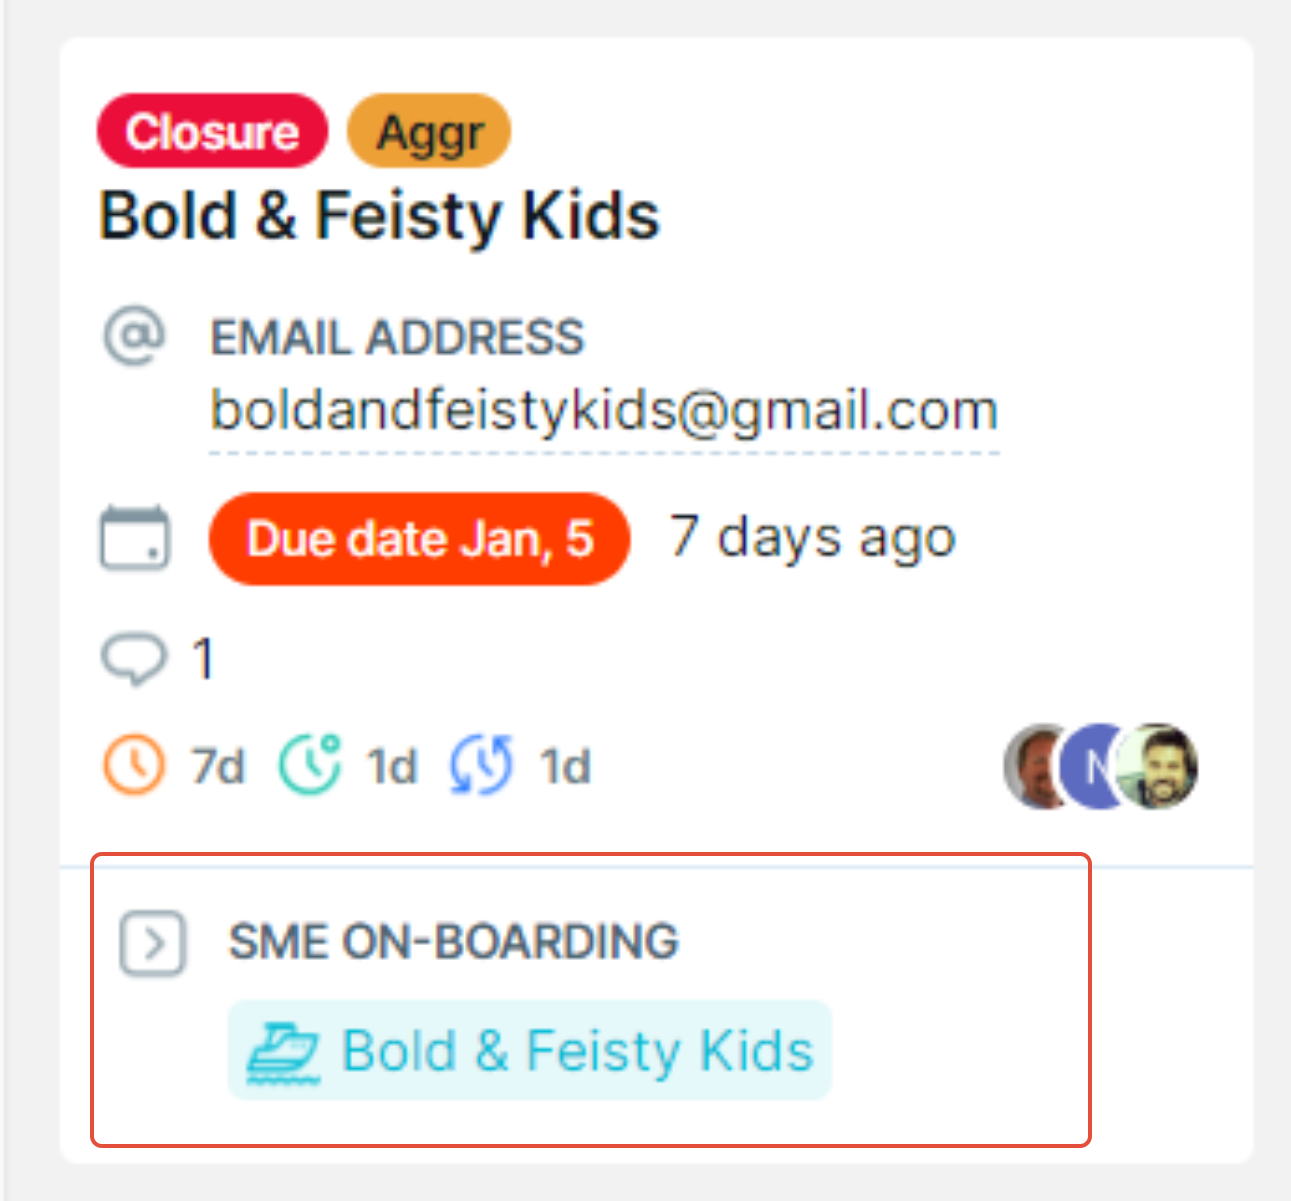
In this phase labels are added to the card to decern and Aggregation merchant from an Enterprise merchant.
A label is also added to distinguish a Cancellation from a Suspension
A label is also added for merchants who have come into the pipe who have been Risk Declined.
The ticket where the merchant has requested to cancel is also referenced in this phase as well as the existing Pipefy Card (merchant application card) and the reason why the merchant has requested a cancellation to be processed on the account.
All this information is crucially completed in order to move the card on to the next phase.
Phase 2 - Sales to Qualify the Cancellation of the account
Once the card is moved to the next team our Sales team will reach out to the merchant to retain the account
Below in the snippet, the commonly used labels has been added for reference. Please choose the correct ones according to the merchant account data
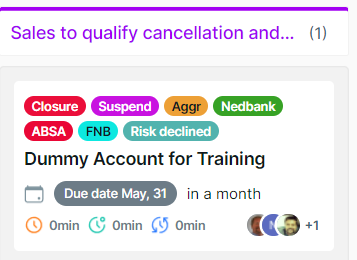 |
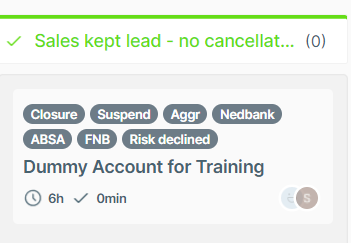
The Sales team will either move the card to "Sales lead kept" phase if they were successfully able to retain the merchant account and relationship.
 |
If this is not ideal for the merchant and they have confirmed the closure of the account, Sales will then go on to move the card to the next phase in the Cancellations process.
Phase 3 - Operations Disables / Suspends
The cancellation of the merchant account has now been confirmed by the merchant and the Operations team can now
officially disable and deactivate the merchant in all live systems.
Step 1 of phase 3 - Deactivate all active (live) Merchant Accounts and Channels in the Console
 |
We would then need to click on the merchant account > navigate to Live Configurations tab and switch off all the
status toggles only
A fresh tip - we only switch off status toggles so that when/if the merchant requests to re-instate their account we can simply reactivate by switching these on only and all other live configurations will remain the same
After we have switched off the status toggles the merchant account status should show as inactive
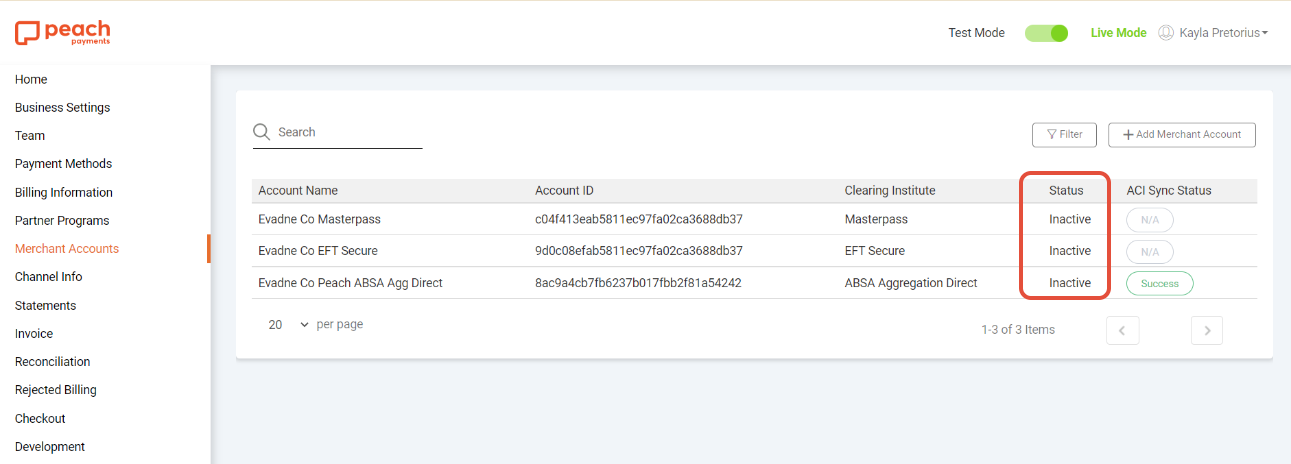 |
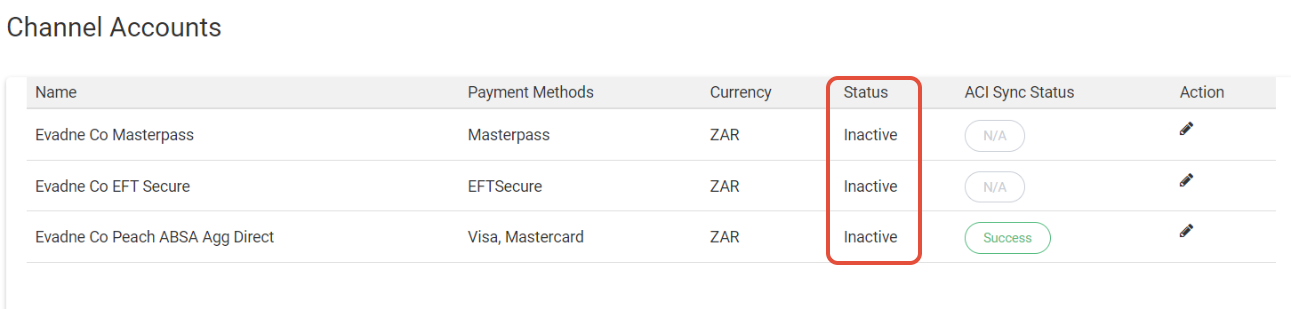
After this step is completed we can then do the same by navigating to Channel info > Accounts tab in the Peach Payments sidebar and individually switching off the status toggles for the various channels
We do not untick any currency or payment method info as this will remain relevant when or of the merchant decides to reinstate their account
 |
All Channel accounts should have an "Inactive" status thereafter
 |
Step 2 of phase 3 - Deactivate EFT Secure Merchant account in the EFT Portal
Navigate to https://eft.ppay.io/ > find the merchant account in the Peach Payments sidebar in the EFT Portal
 |
Click on the "Deactivate" button to disable the account - this ensures and finalizes that no EFT payments can be processed with the merchant account
 |
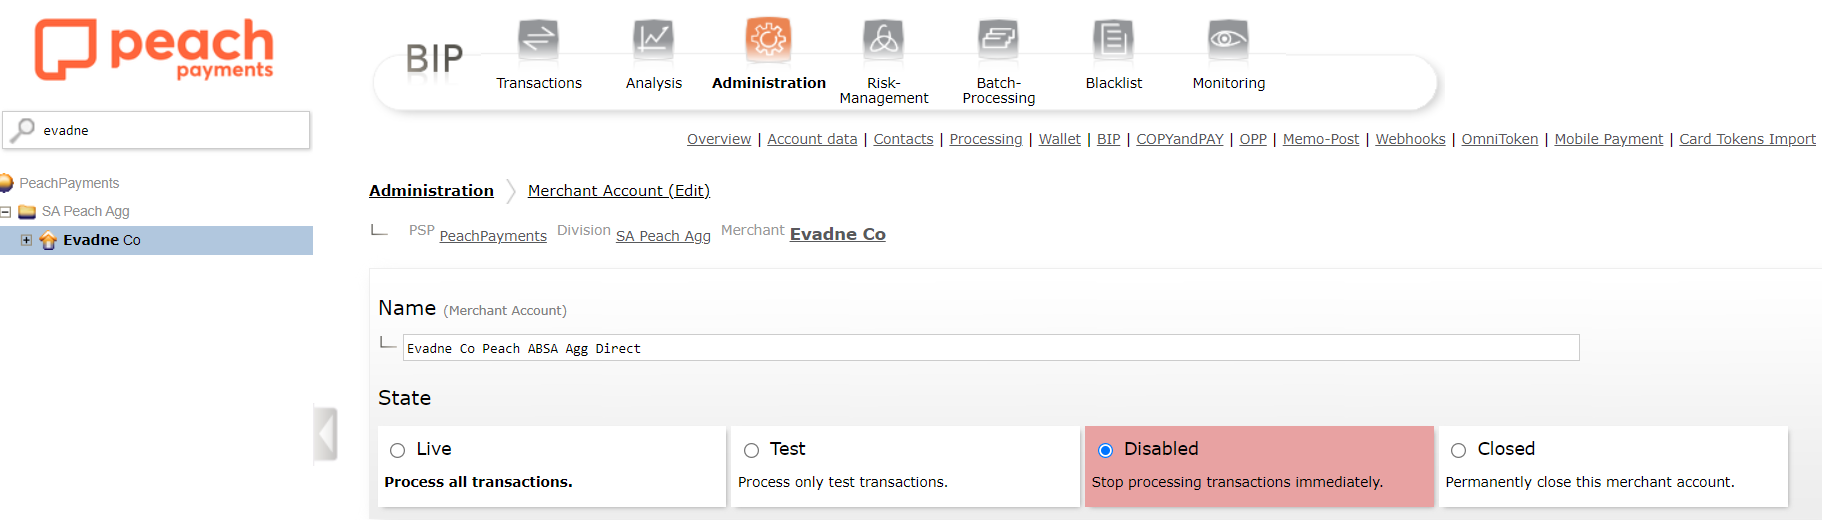
Step 3 of phase 3 - Navigate to the BIP to disable the merchant account
Search for the merchant on the merchant level in the BIP > Navigate to Administrations tab > Select Account data option
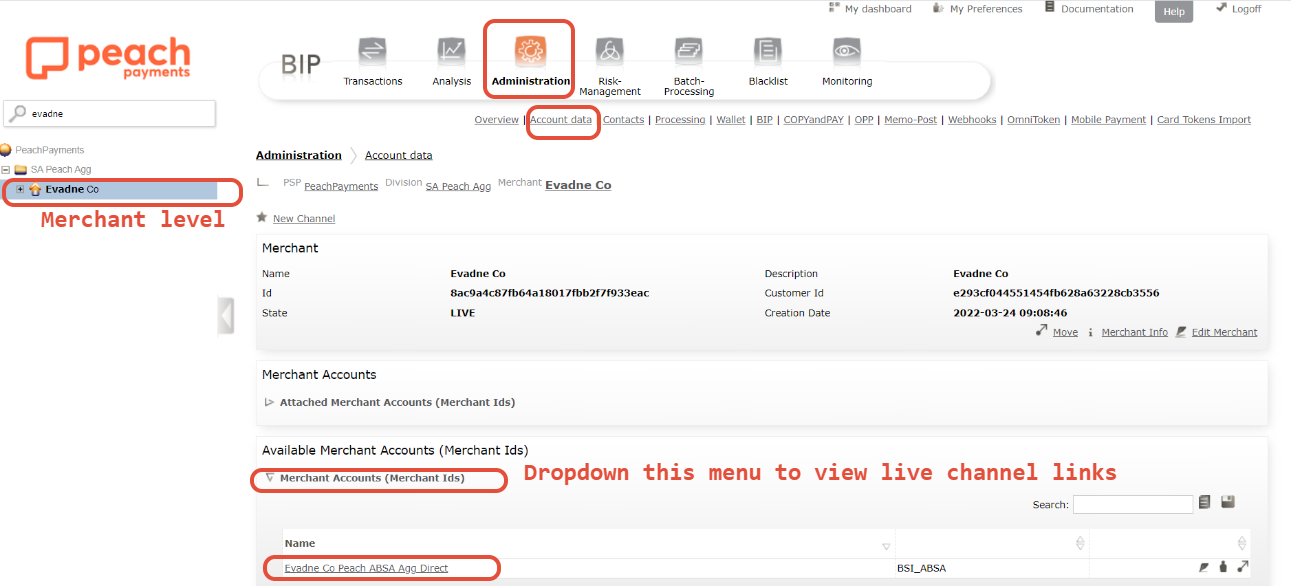 |
Change the merchant state from live to Disable > hit save at the very bottom of this page
 |
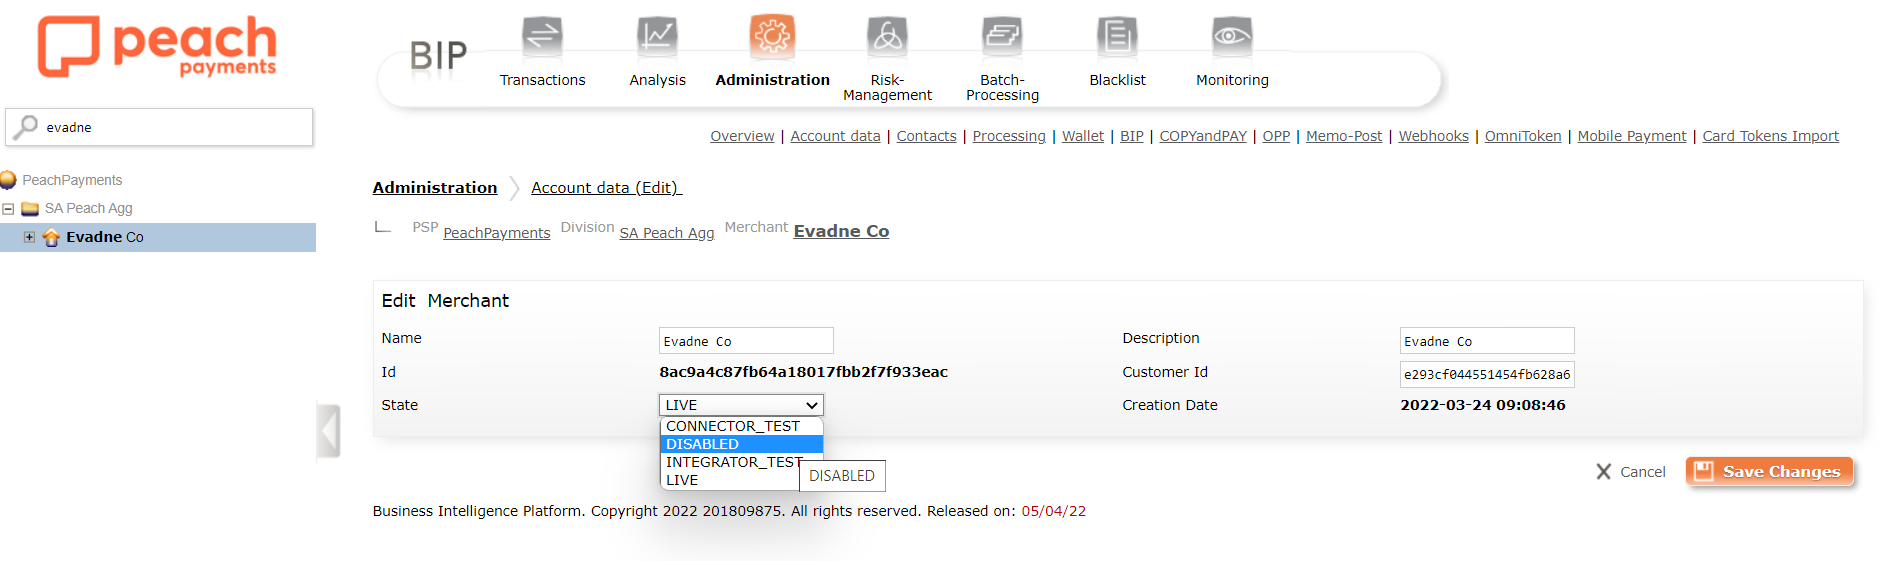
Navigate back to the Account Data Section > On the very top of the merchant data section > click Edit merchant >
Disable the merchant account > hit Save Changes as shown below
 |
Once we have done this the page will reload and the merchant account will be disabled, We can successfully identify the account as being disabled by the "greyed out " house icon in the sidebar showing Peach Payments merchants / entities
 |
Once we have done this we have successfully deactivated the merchant account in the BIP and all systems we can add a timestamp to the comments, here is an example:
Disabled in BIP at 14:15 on Thurs 21 September 2021
Console services deactivated
Console State left for billing
We can then navigate to the cancellation card in the pipe and then tick all the relevant fields
 |
Step 4 of phase 3 - Send out the "Confirmation of Processing" email to the merchant and resolve the Freshdesk ticket
 |
Additional step to phase 3 - For Enterprise merchants and Mobicred merchants
To close an Enterprise Merchant we will need to reach out to the Acquiring Facility to close the merchant's account as the merchant would have a direct account with the Bank who settles them.
In Operations to disable/suspend in BIP and Console phase we can find the email to request the bank to close the account.
In this email the Merchant trading as name and Bank MID will populate in the template as you have input the data in the fields required in this section.
The email to request closure of the merchant account will be forwarded directly to the bank facility from the pipe.
Once they respond the email will trigger a ticket to Freshdesk where the admin will assign it to the requestor to monitor.
You can also monitor this in the "Email" section of the cancellation form.
When the banking facility confirms closure of the merchant account, the ticket can be resolved.
 |
If a merchant has an existing and LIVE Mobicred account we can forward a request to the Mobicred team to close.
We will usually send a separate email from Freshdesk requesting closure of a Mobicred merchant account.
Mobicred relevant contacts for this process can be found in the internal contact sheet please ensure the request is forwarded to the correct recipients.
You may add the live configuration details in the body of your email, which will be found in the Console.
 |
Upon Mobicred's confirmation of closure for the merchant account you may resolve your ticket.
Step 5 of phase 3 - Move the cancellation card to the next phase "Finance to invoice merchant"
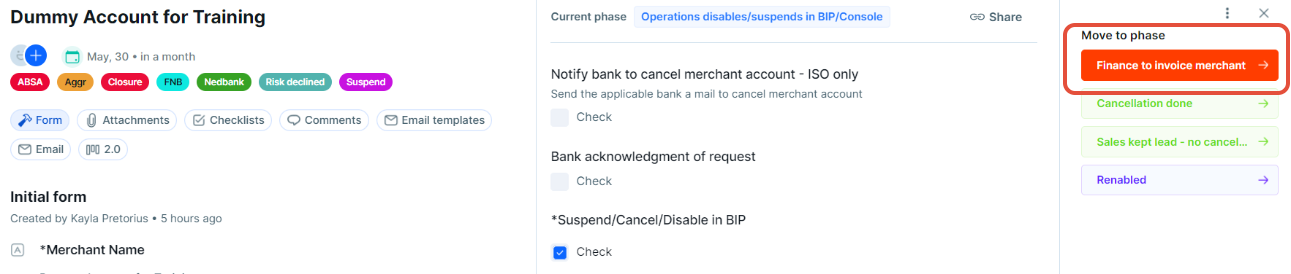 |
After the card is moved the process to close a Peach Payments Aggregation merchant account is complete.
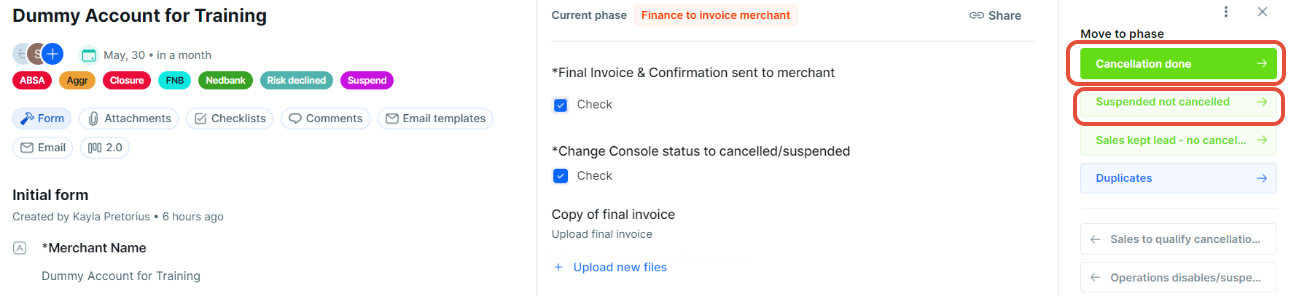
Phase 4- Finance to Invoice Merchant
A fresh tip - Peach Payments billing takes place one month in arrears, the merchant will not be billed any fees as a charge of service if they have not been transacting within the month they have requested to cancel.
If the merchant has been transacting in the month they have requested to cancel their account. They will be billed as per the fees stipulated in their current price plan for transactions processed within that month.
Once the merchant has been invoiced the Finance team will change the state of the merchant account to "cancelled" or "suspended" and move the card to "cancellation done"
 |
The Cancellation process of a Peach Payments Merchant account is complete.
 |  |